Tracks Explorer#
App features#
With the Tracks Explorer App, you can
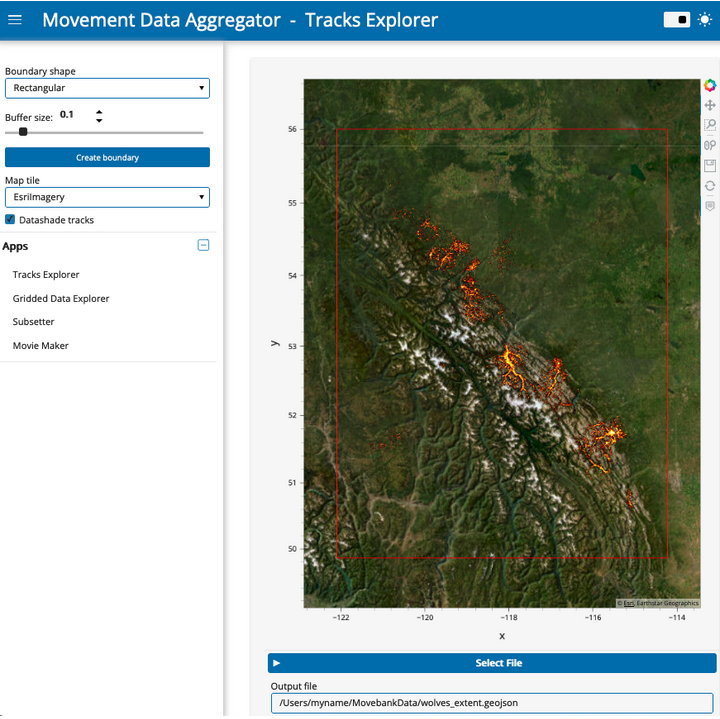
Visualize point locations from your Movebank data as individual points or aggregated point density. You can select from a variety of map tiles to use as a background.
Automatically generate a spatial frame around the track points and save this as a .geojson file that can be used in the NASA AppEEARS interface to extract remote sensing products for the research area.
Using the app#
 Data from Hebblewhite and Merrill, study Hebblewhite Alberta-BC Wolves
If you haven’t already, download a local copy of the tracking data you want to use, in Movebank’s .csv format. It is possible to subset or combine data from different studies.
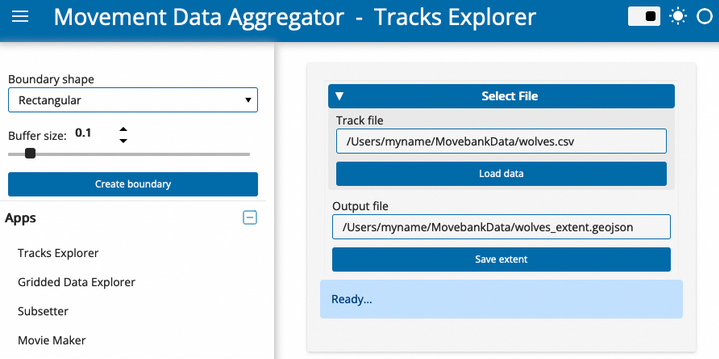
Under “Select File”, paste the full filepath to a .csv file of tracking data, including the file name. In the current version, this .csv file needs to use Movebank’s format. An example filepath is “/Users/myname/MovebankData/wolves.csv”.
Click “Load data”. An interactive map will appear of your dataset, where you can pan/zoom to explore the dataset. If a map does not load, view the status message. The message “Error.. Check options and try again” likely indicates that your filepath is incorrect.
You can change the background map tile using the drop-down menu in the sidebar.
Toggle the “Datashade tracks” checkbox in the sidebar to turn on/off the point density aggregation feature. When unchecked, individual semi-transparent points will be displayed. Note that for very large datasets, plotting will be slow if the “Datashade tracks” option is turned off.
A boundary for the tracks dataset is shown on the map in red. The default option uses a rectangular boundary with a buffer size of 0.1 (scale relative to the extent of the tracks). You can adjust the buffer size or change the boundary shape to a convex hull using the widgets in the sidebar.
To save the boundary to a .geojson file, scroll down and if needed, edit the file name and location under “Output file”. Then simply click the “Save extent” button.